Create a resource node
Overview
This tutorial will walk you through adding a piece of digital content (an image and some metadata) into an Islandora repository, creating an Islandora Resource Node. At the end, you will have metadata in a Drupal node, a file stored in Fedora, and derivatives automatically created.
Video version available
The material in this tutorial is presented in our video, Adding Content.
Tools
For this tutorial you will need an instance of Islandora Starter Site. You can also use the online sandbox or one of the sandbox VMs.
login credentials for online sandbox
Step 1: Create an Islandora Node
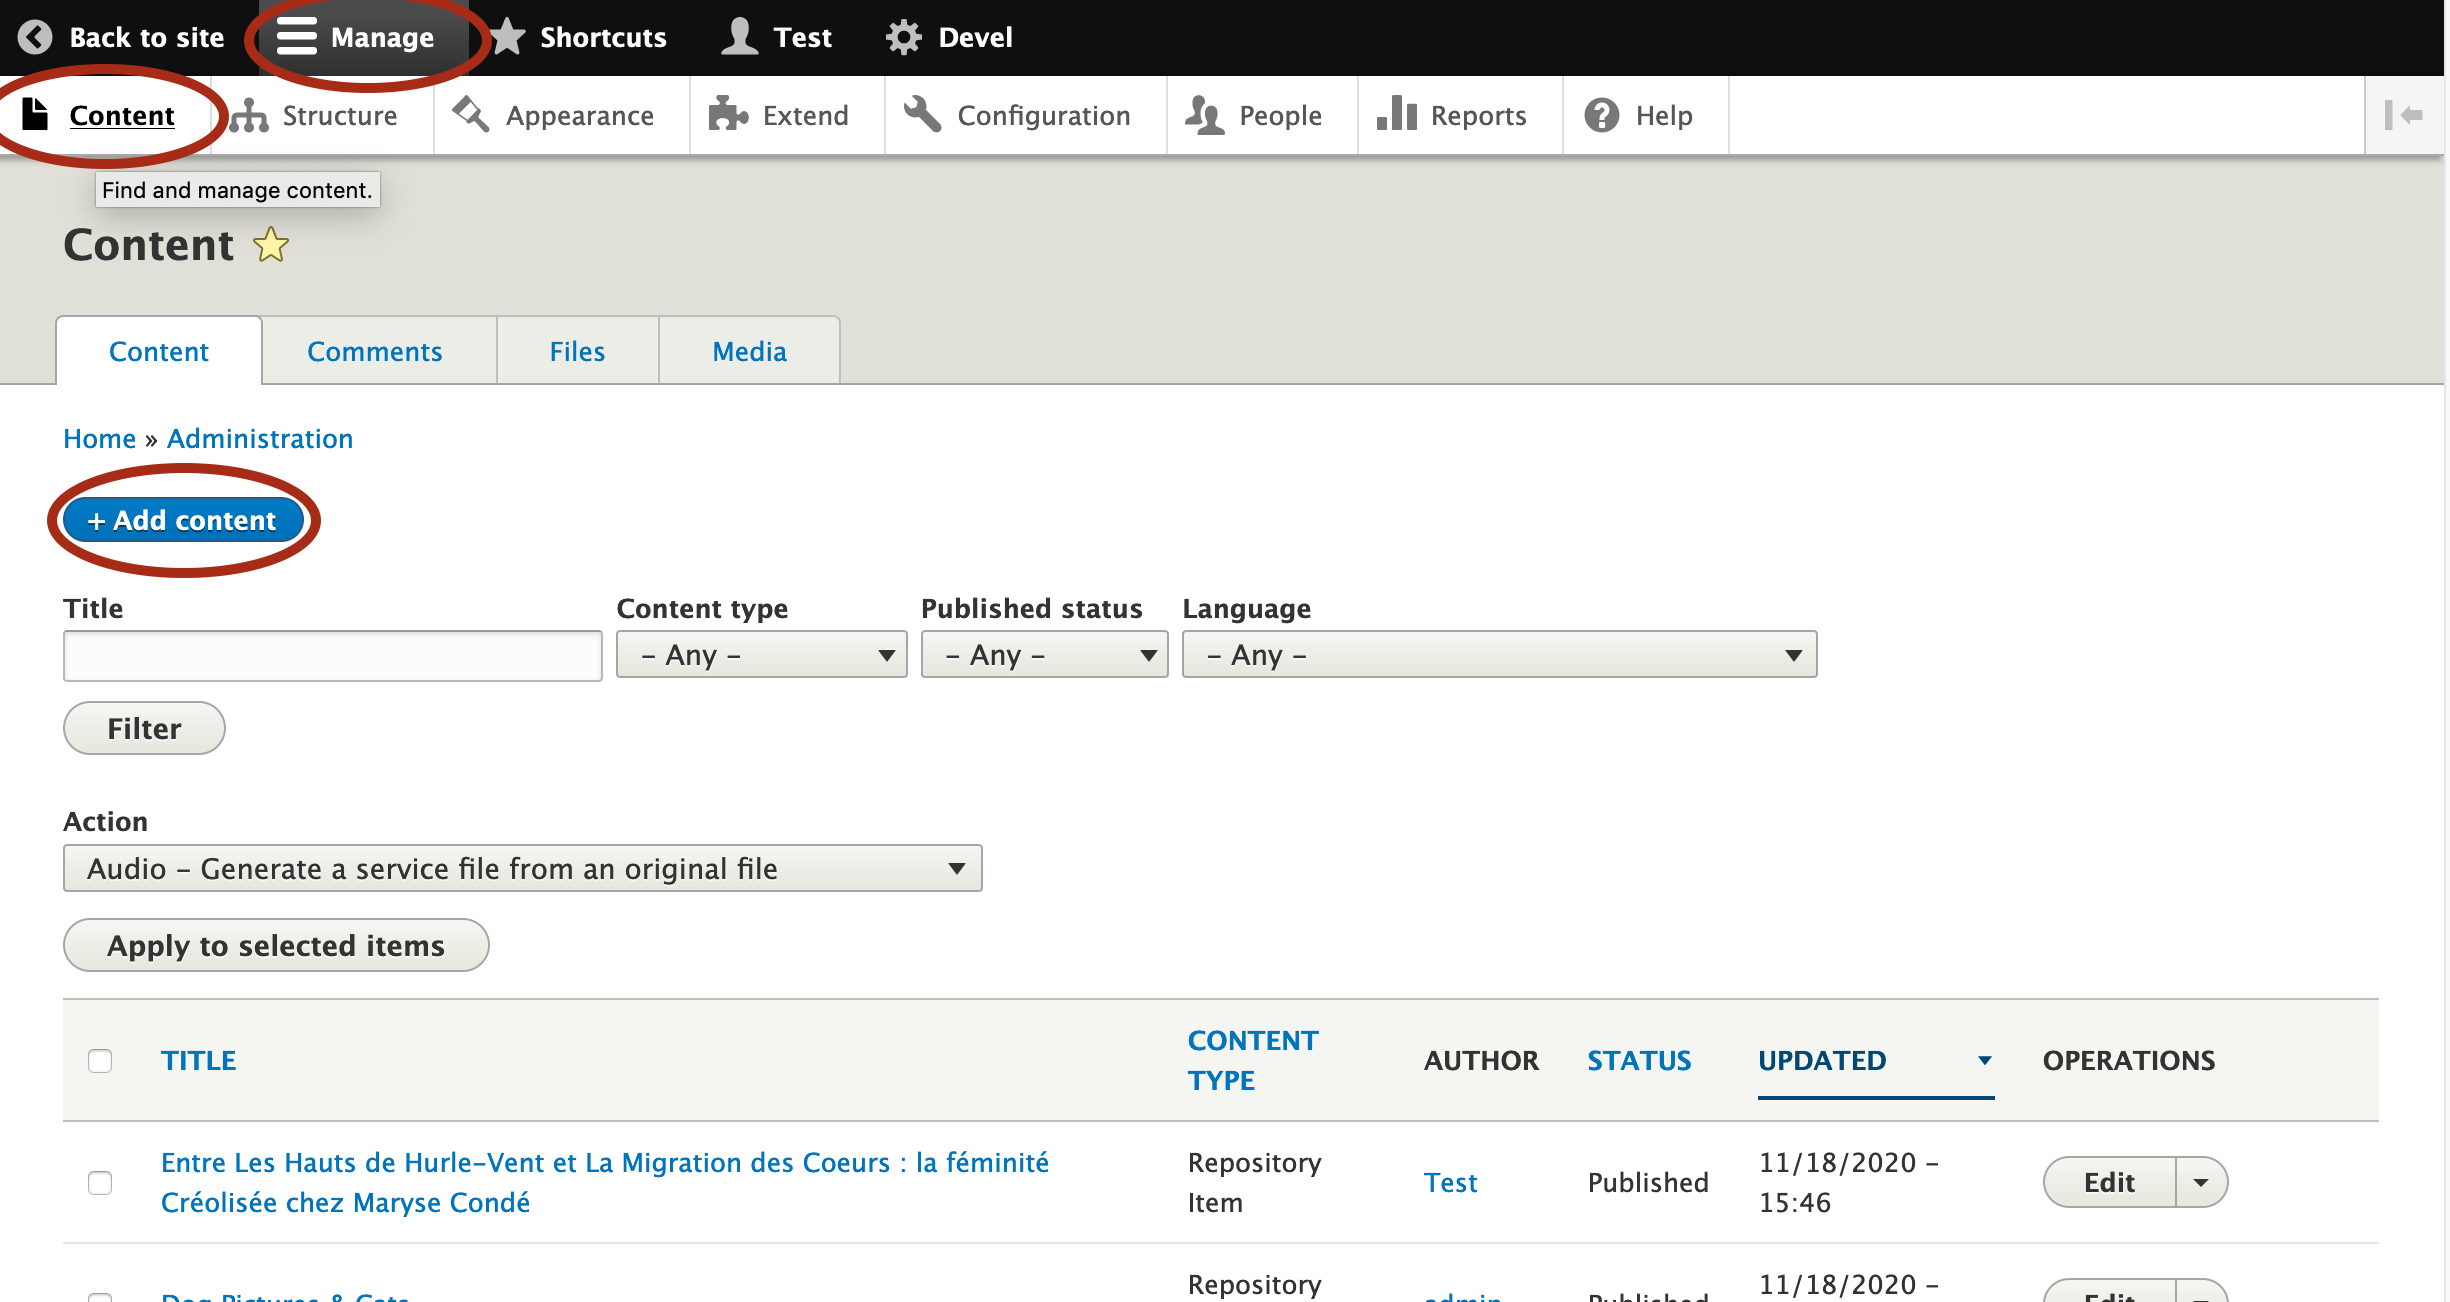
To add content to Islandora, start by creating a node. When logged in to Drupal as an administrator, navigate with the top menu bar to Manage >> Content >> Add content or click on Add content under the Tools menu.
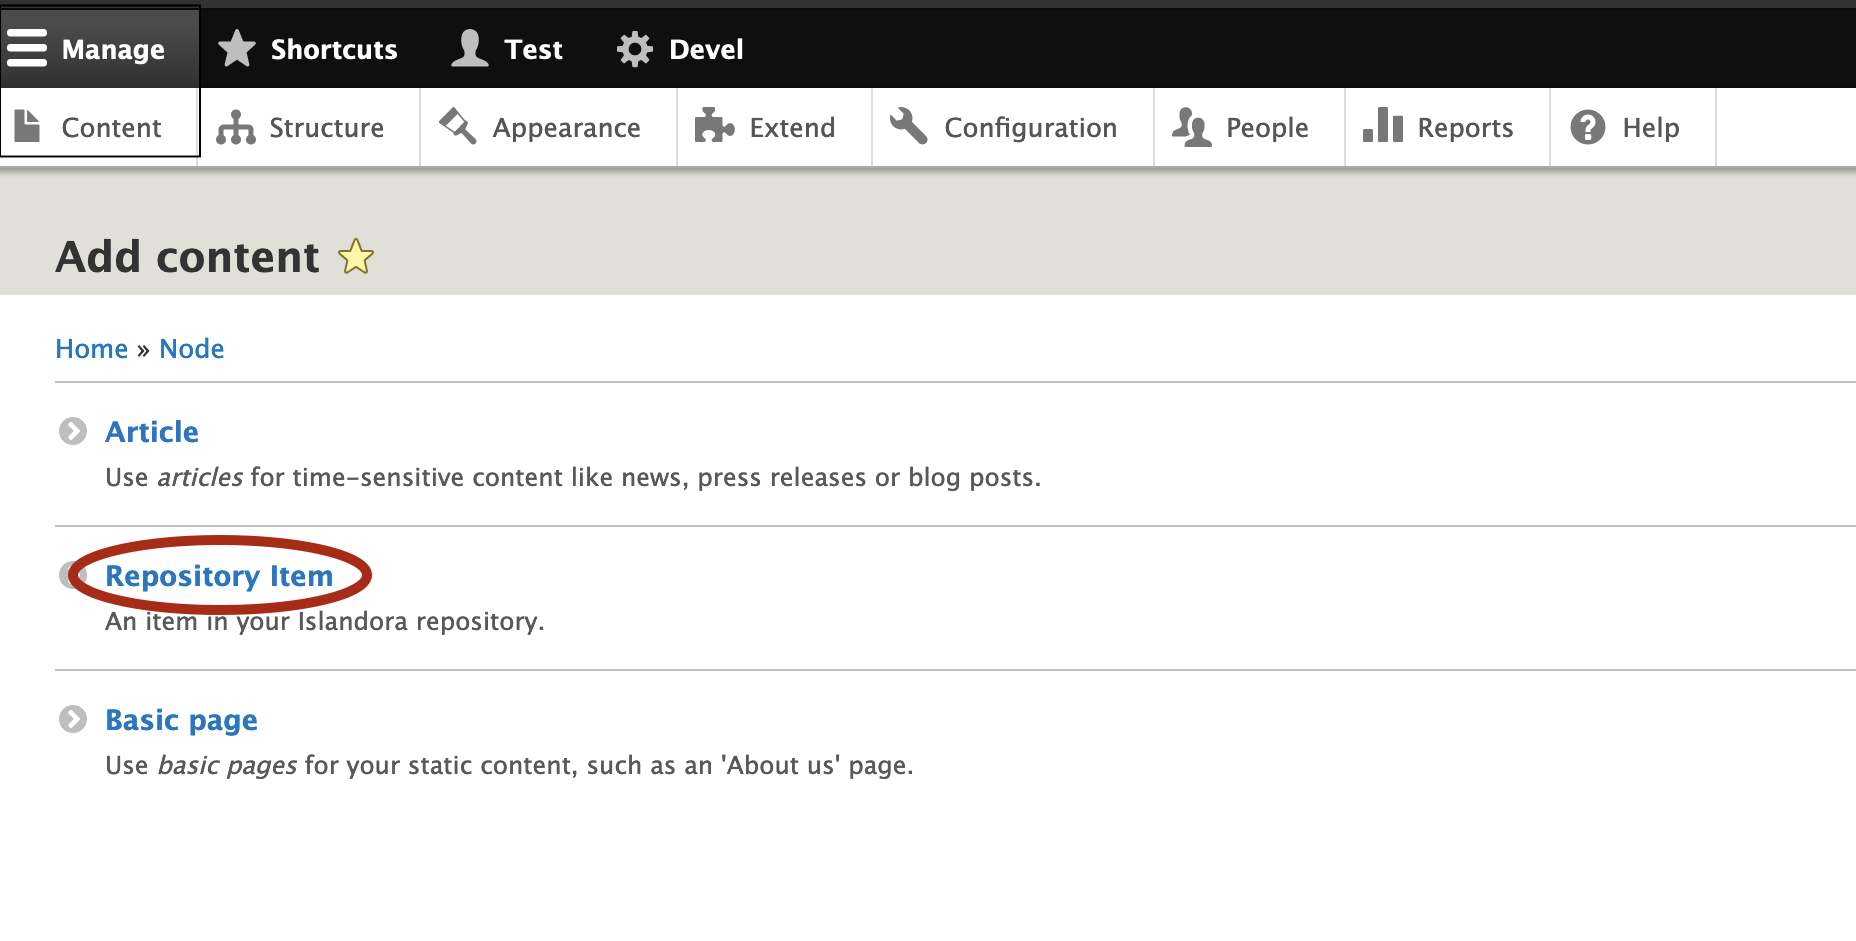
Next, select a content type that is configured with Islandora behaviours. In the Islandora Starter Site, there is an Islandora content type. It is called Repository Item.
At the top of the form, the Model field is a mandatory Islandora field. Select Image from the Model drop box. This will enable image display behaviours, and cause image derivatives to be generated once we upload a file.
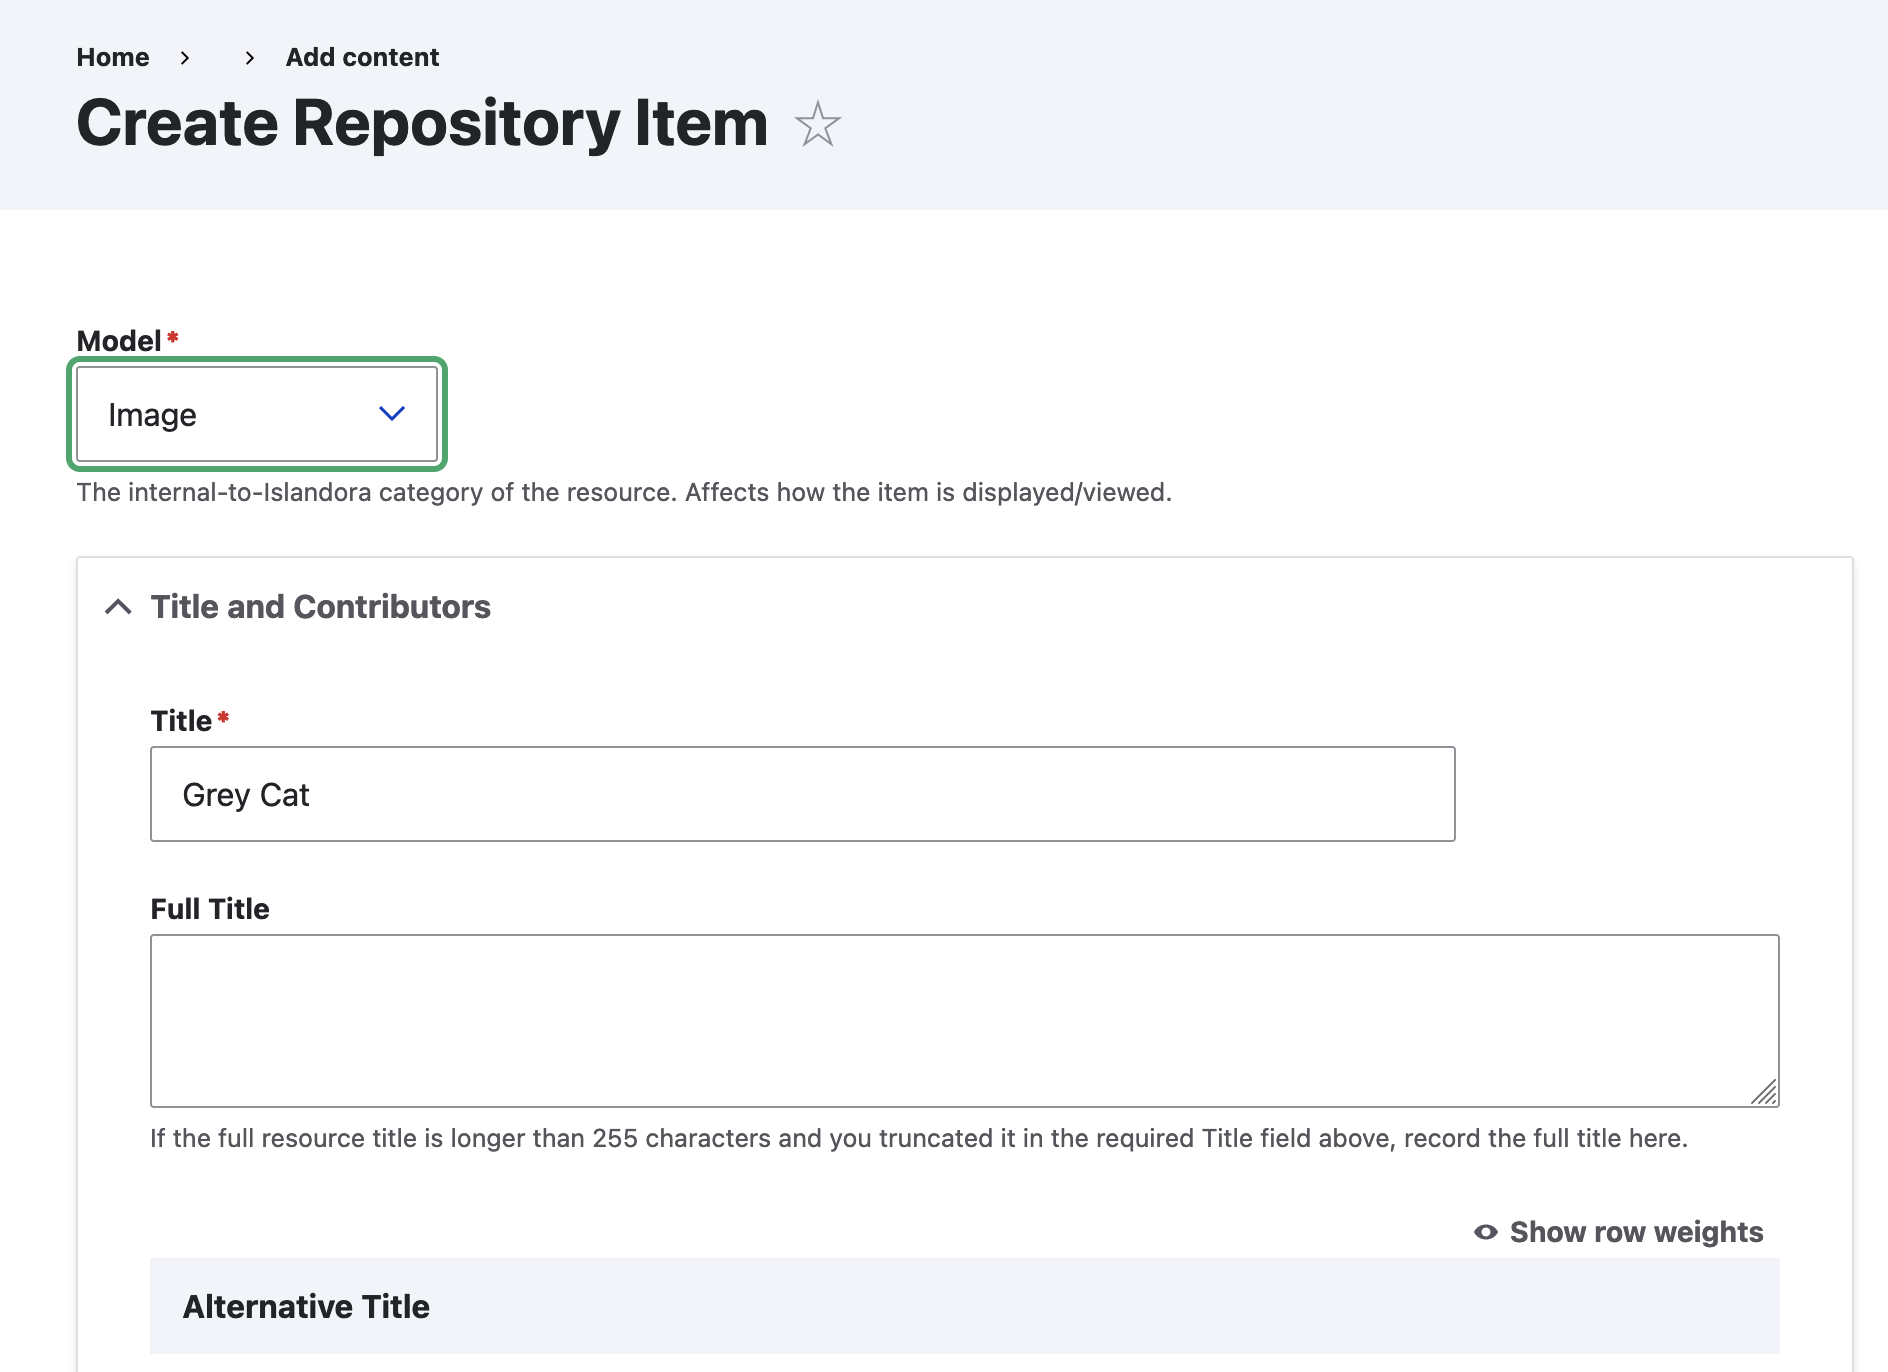
The rest of the form contains a large number of metadata fields, grouped into collapsible sections. Fill out the Title (mandatory) and whichever other fields are applicable to you.
Keep it simple
For this tutorial, do not attempt to fill out any fields with an autocomplete symbol - a small circle at the right-hand-side of the text box. 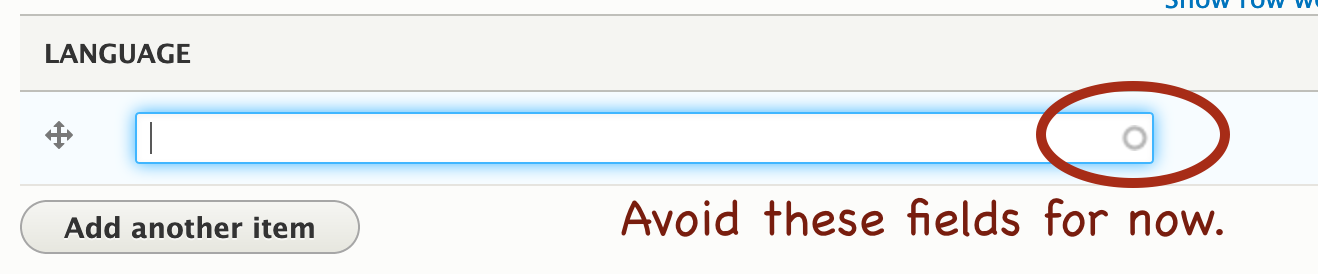
Then, click Save. You have now created a node, and since it is of an Islandora content type, we call it a "resource node."
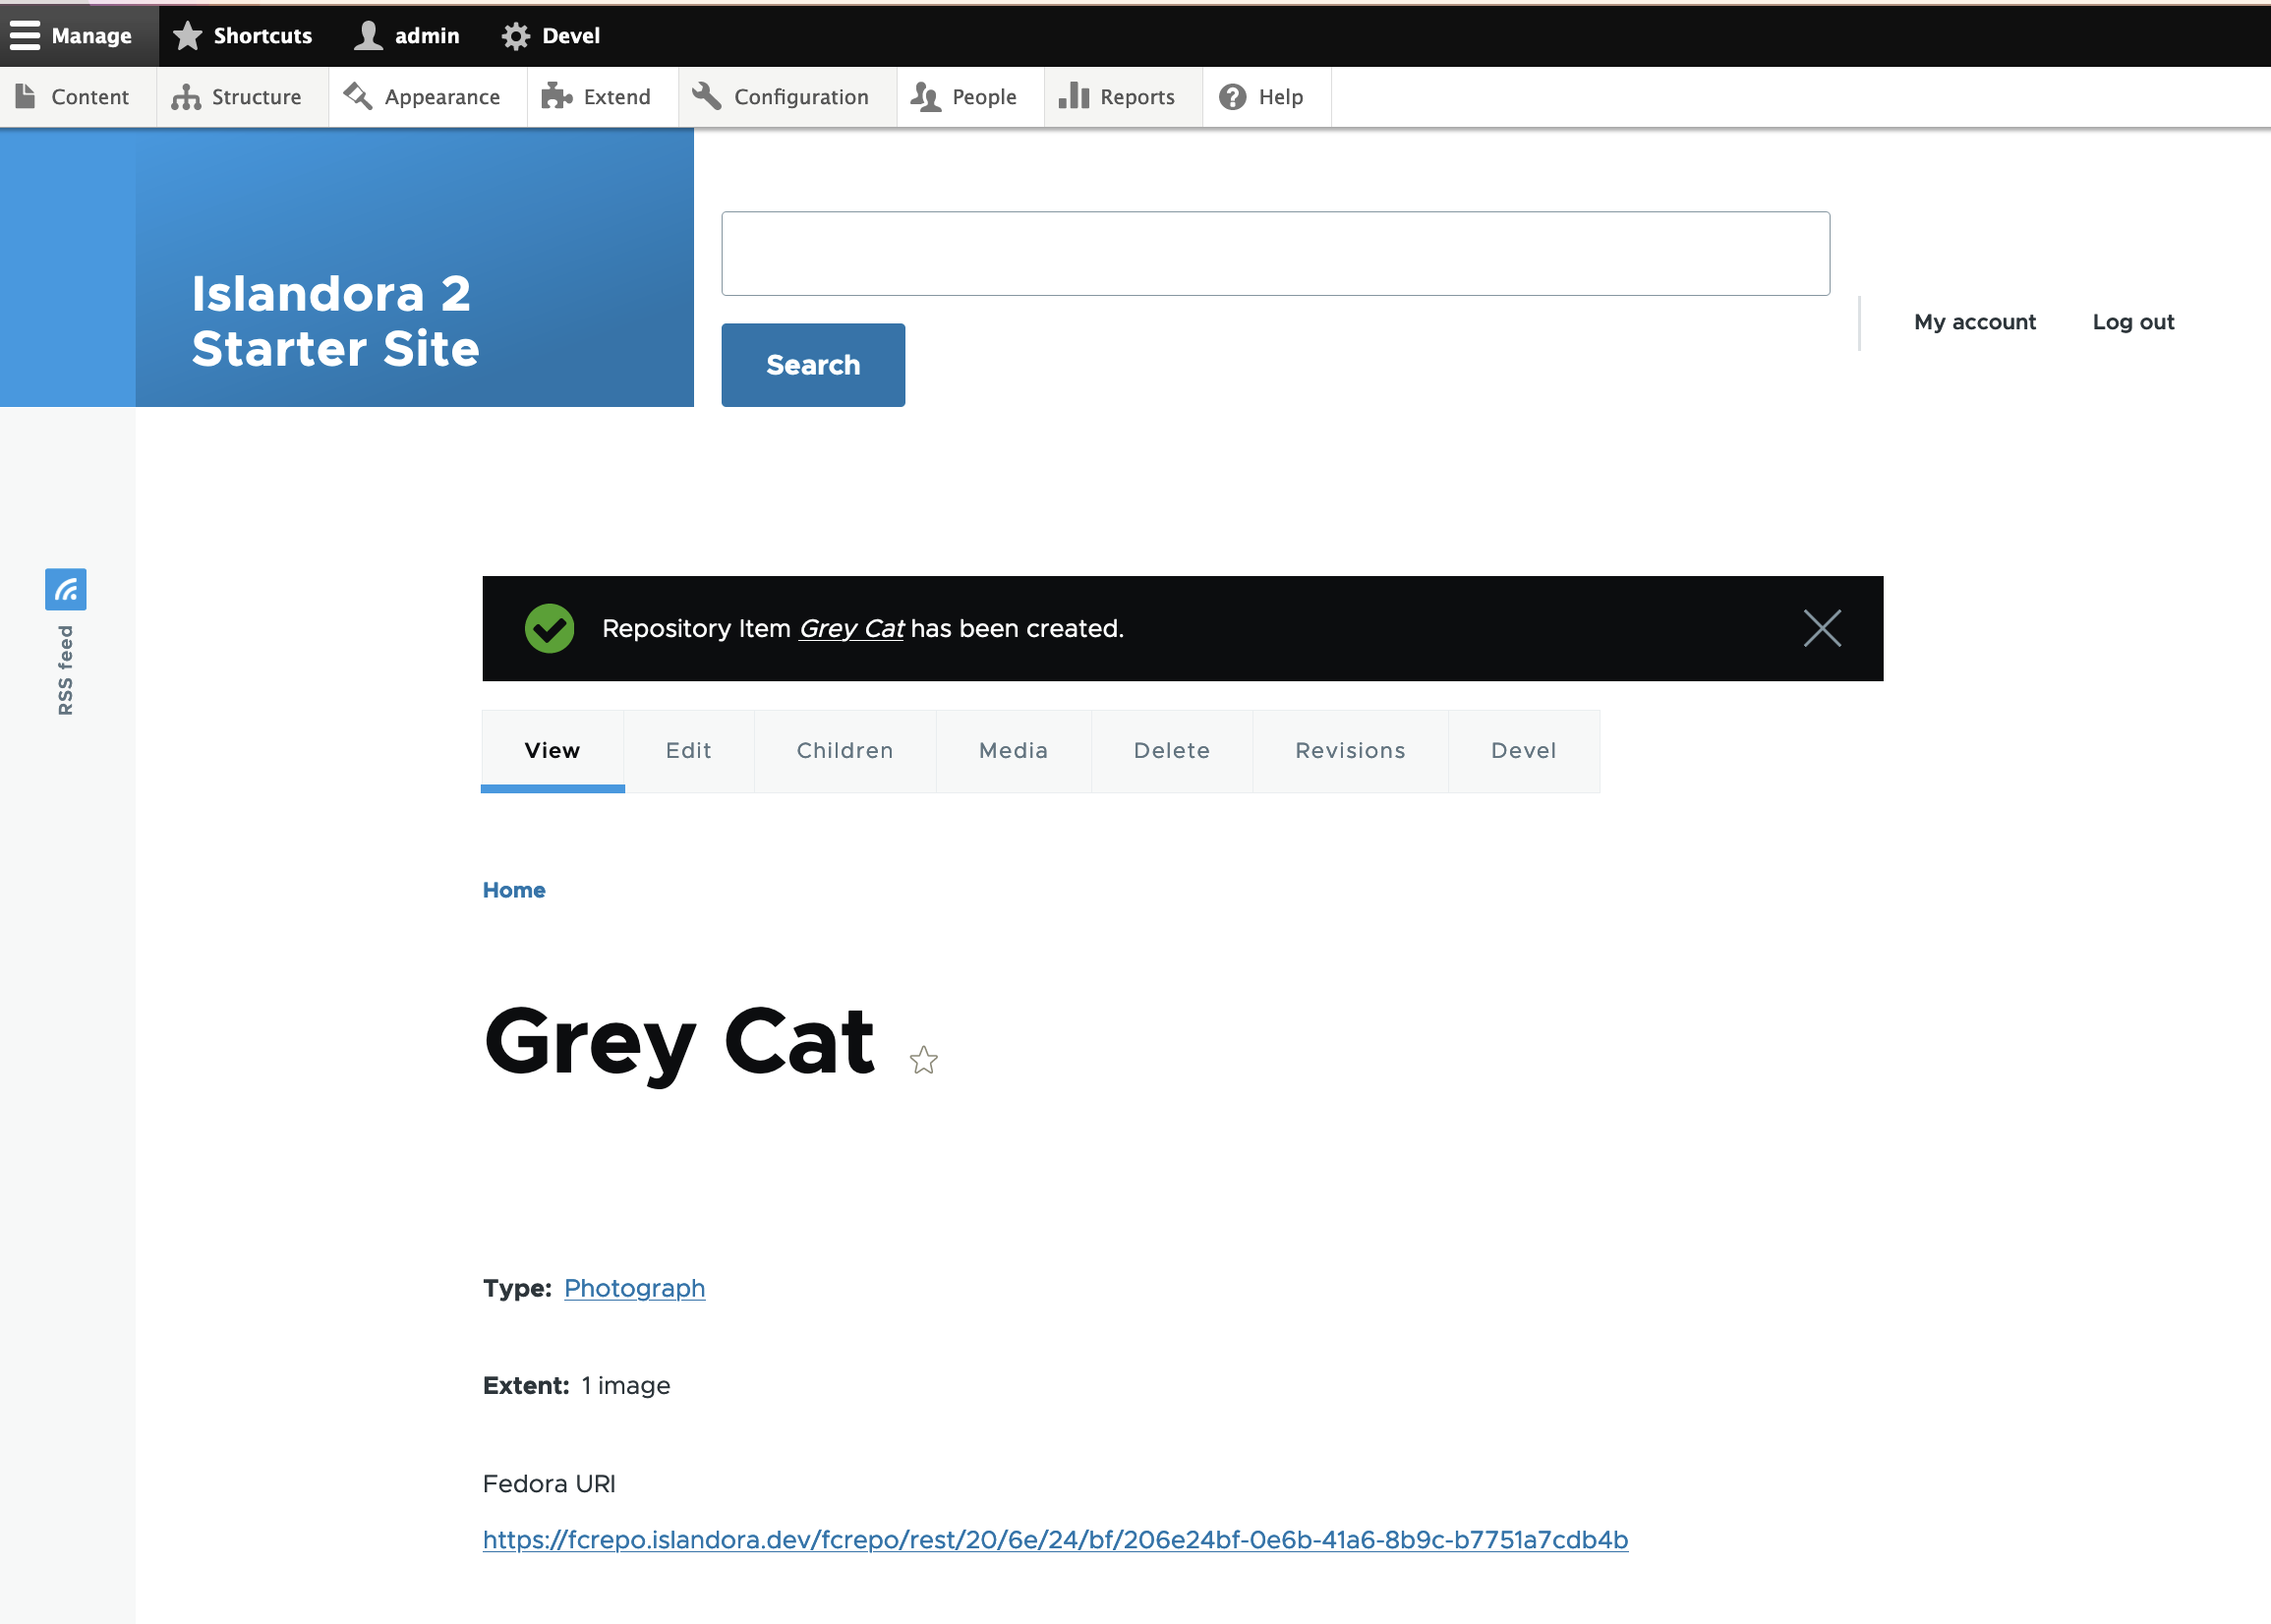
The new node page displays, with the title, any metadata that we entered, and a Fedora URI which you can click on to see if this new node has been synced into Fedora (this only works if you have permission to access Fedora). Congratulations, you have created a resource node!
Step 2: Upload an Original File
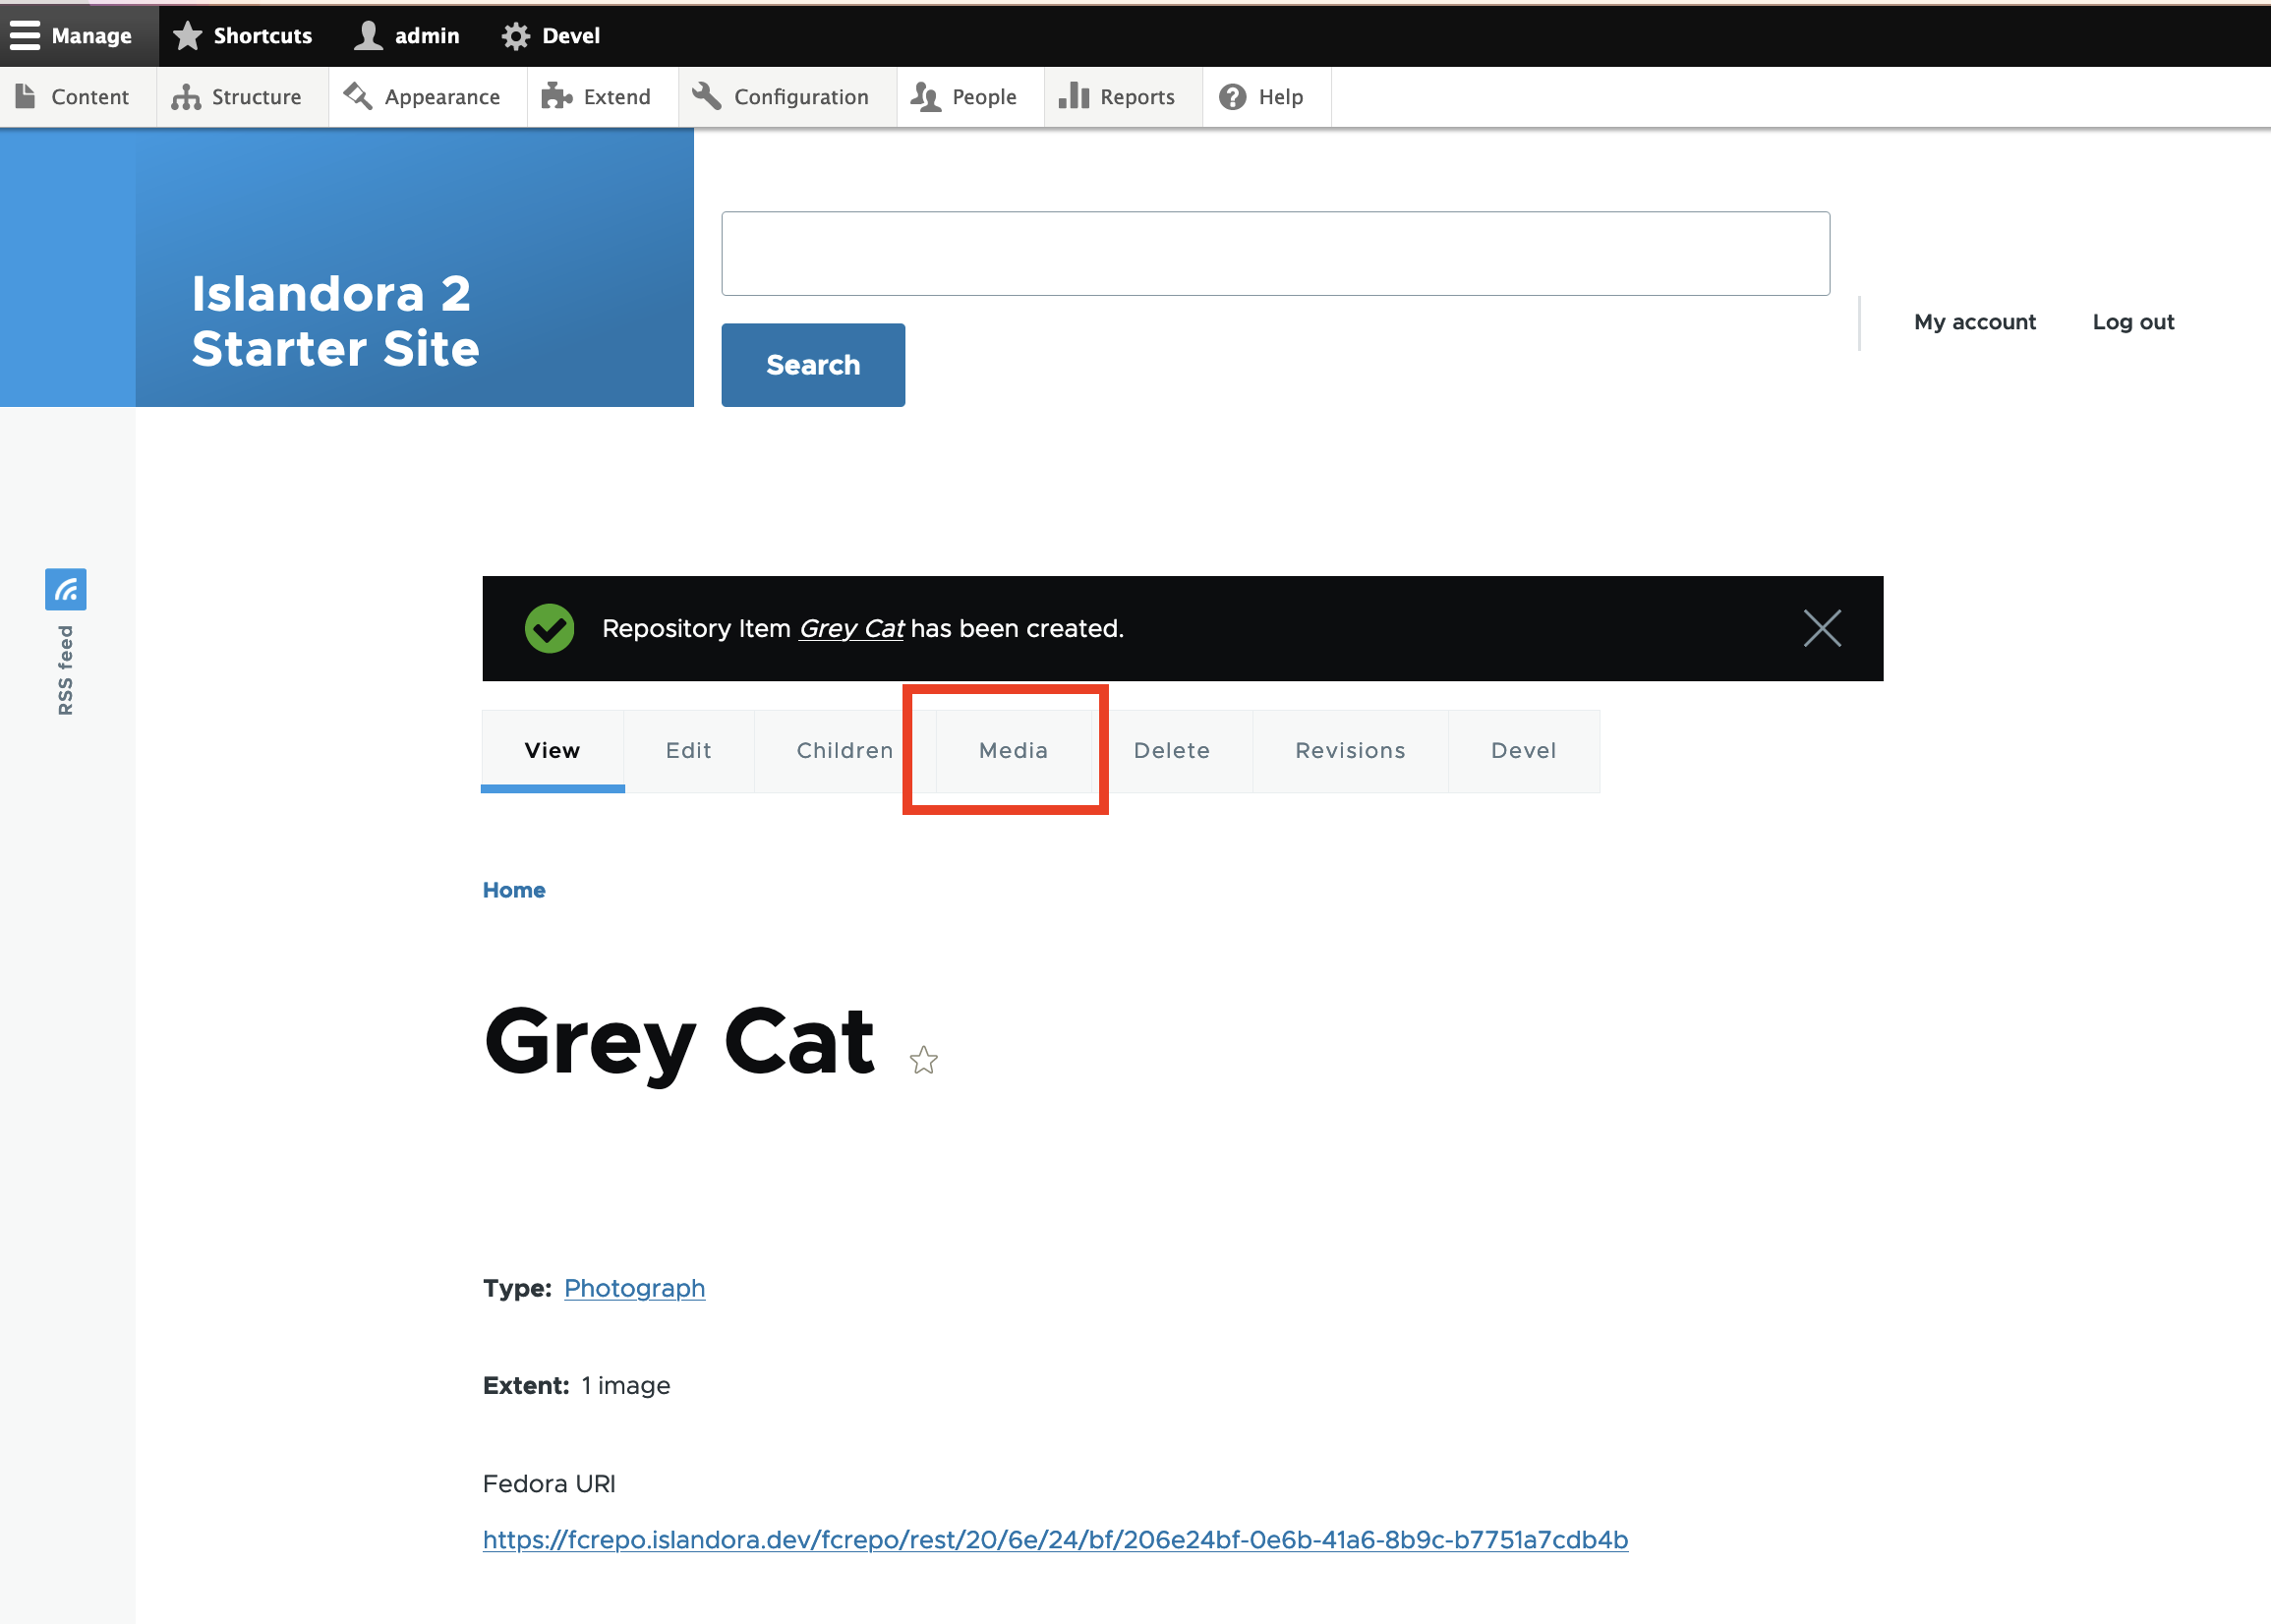
Alas, your node has no files. To upload a file, click on the node's Media tab.
Concept: Media tab
The "Media" tab shows Media that we say "belong to" or are "media of" that node. The idea of media "belonging to" nodes, and the "Media" tab, are part of Islandora but not part of standard Drupal.
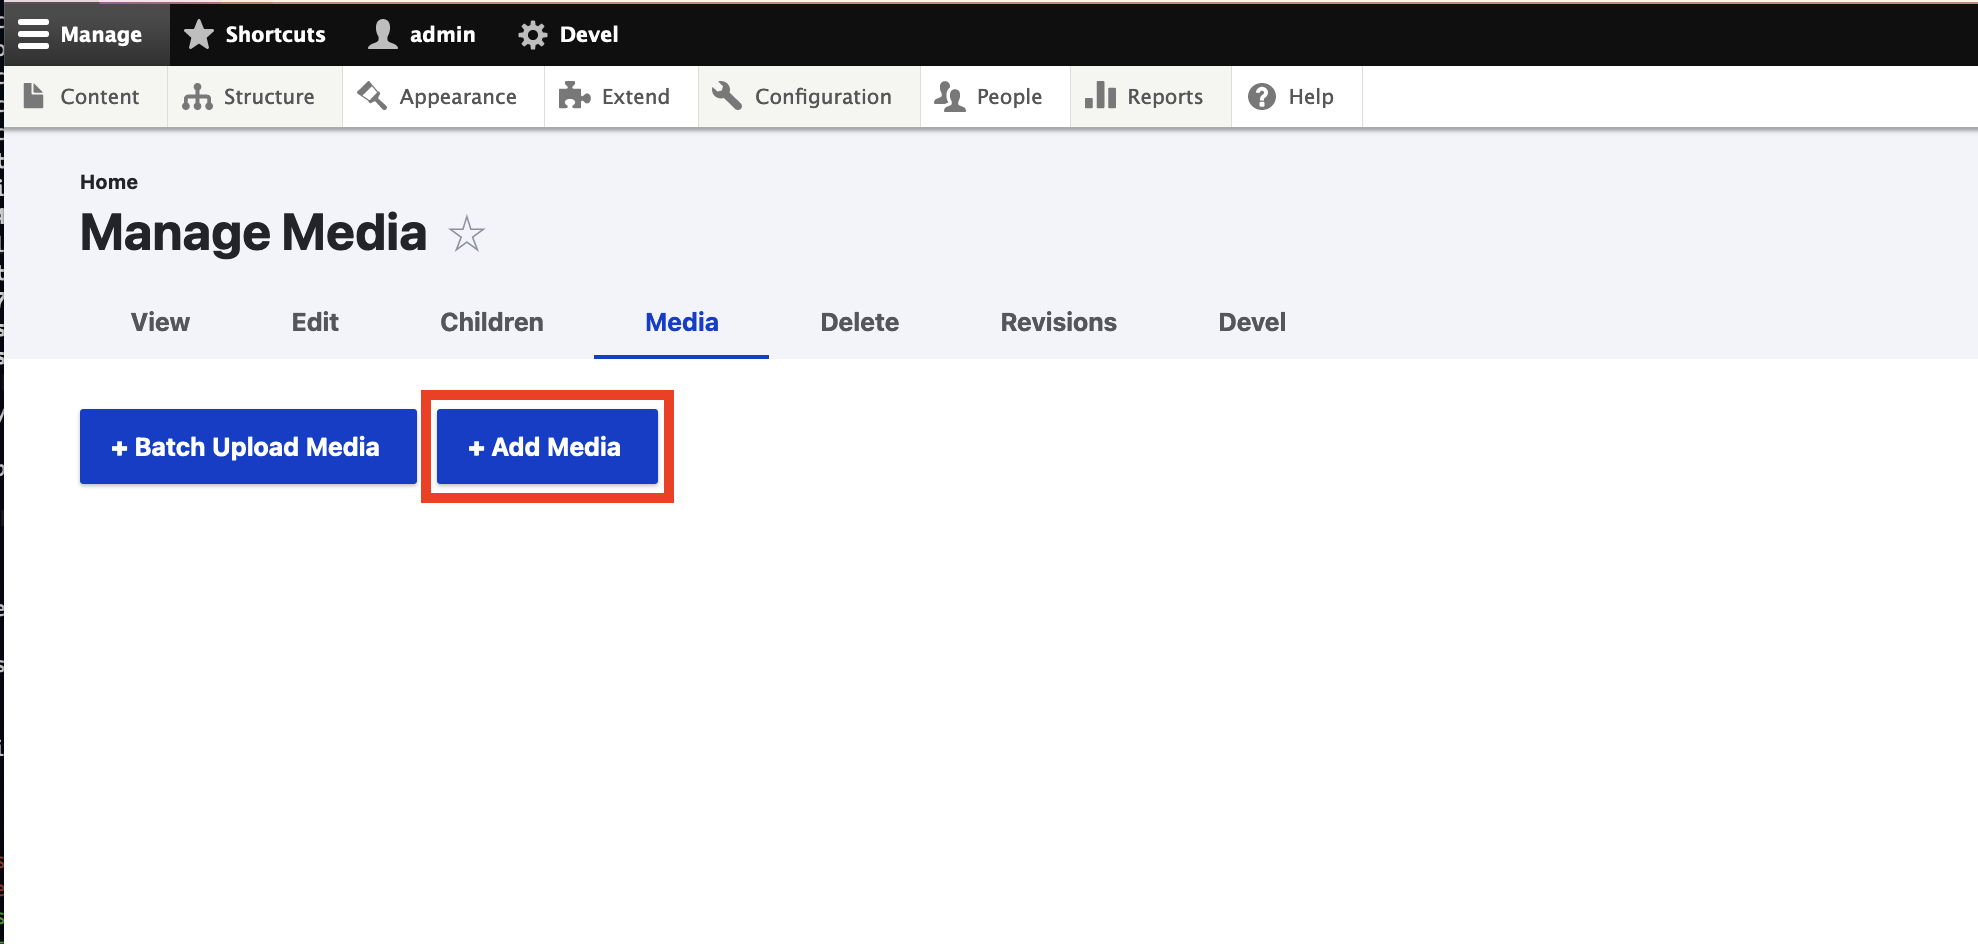
The Media tab shows nothing listed, because this node has no files. So click on Add Media. You will be taken to a list of media types to choose from.
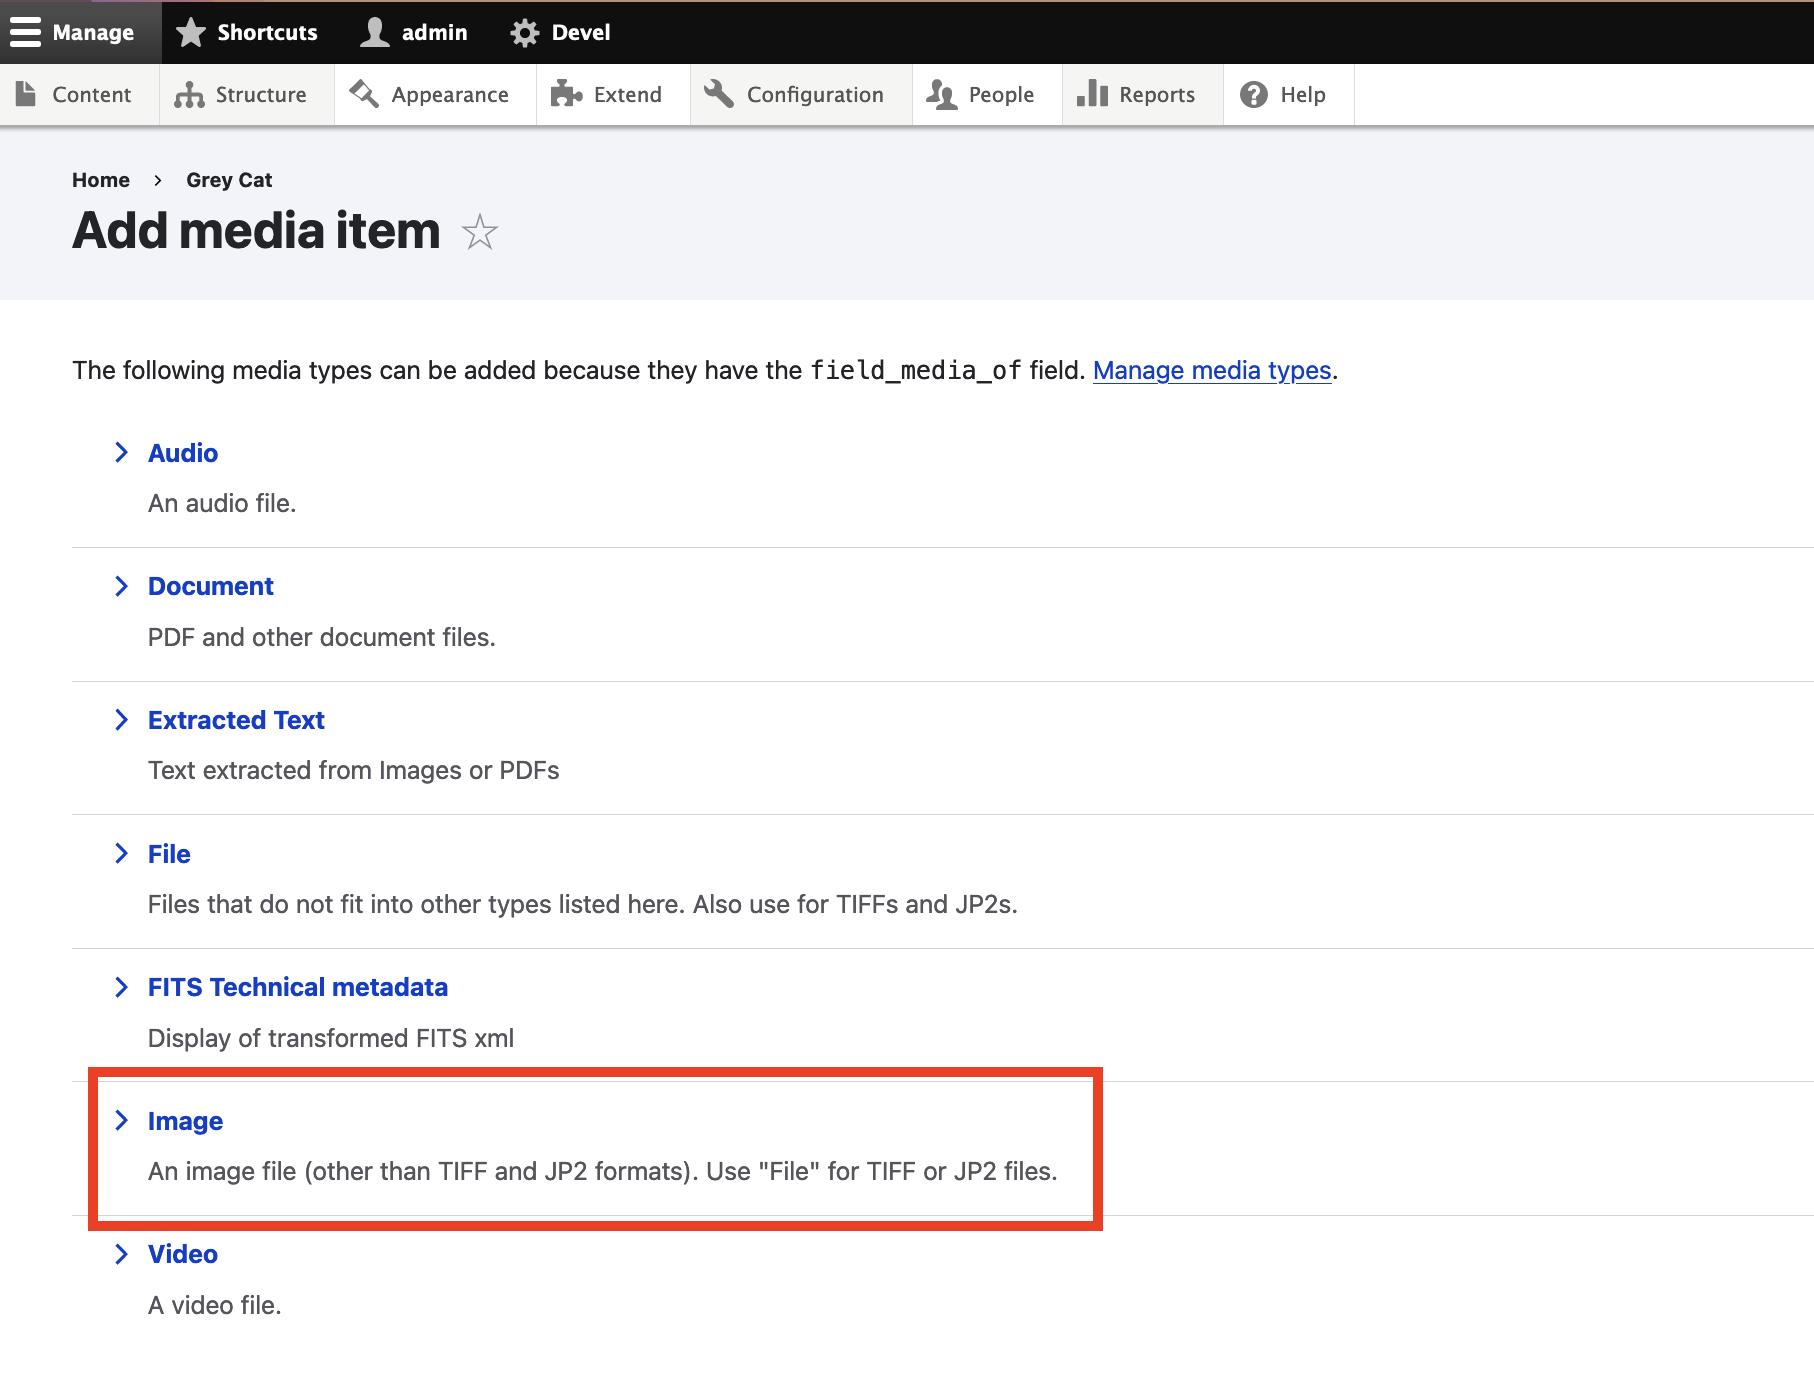
We want to add a jpg image, so click on Image. You are now presented with a form to create a media.
Images vs TIFFs
Drupal considers any type of image that can be viewed natively in the browser as an Image. For other image types that require special viewers, such as TIFFs, you would have to choose File. Learn more about Media in Islandora.
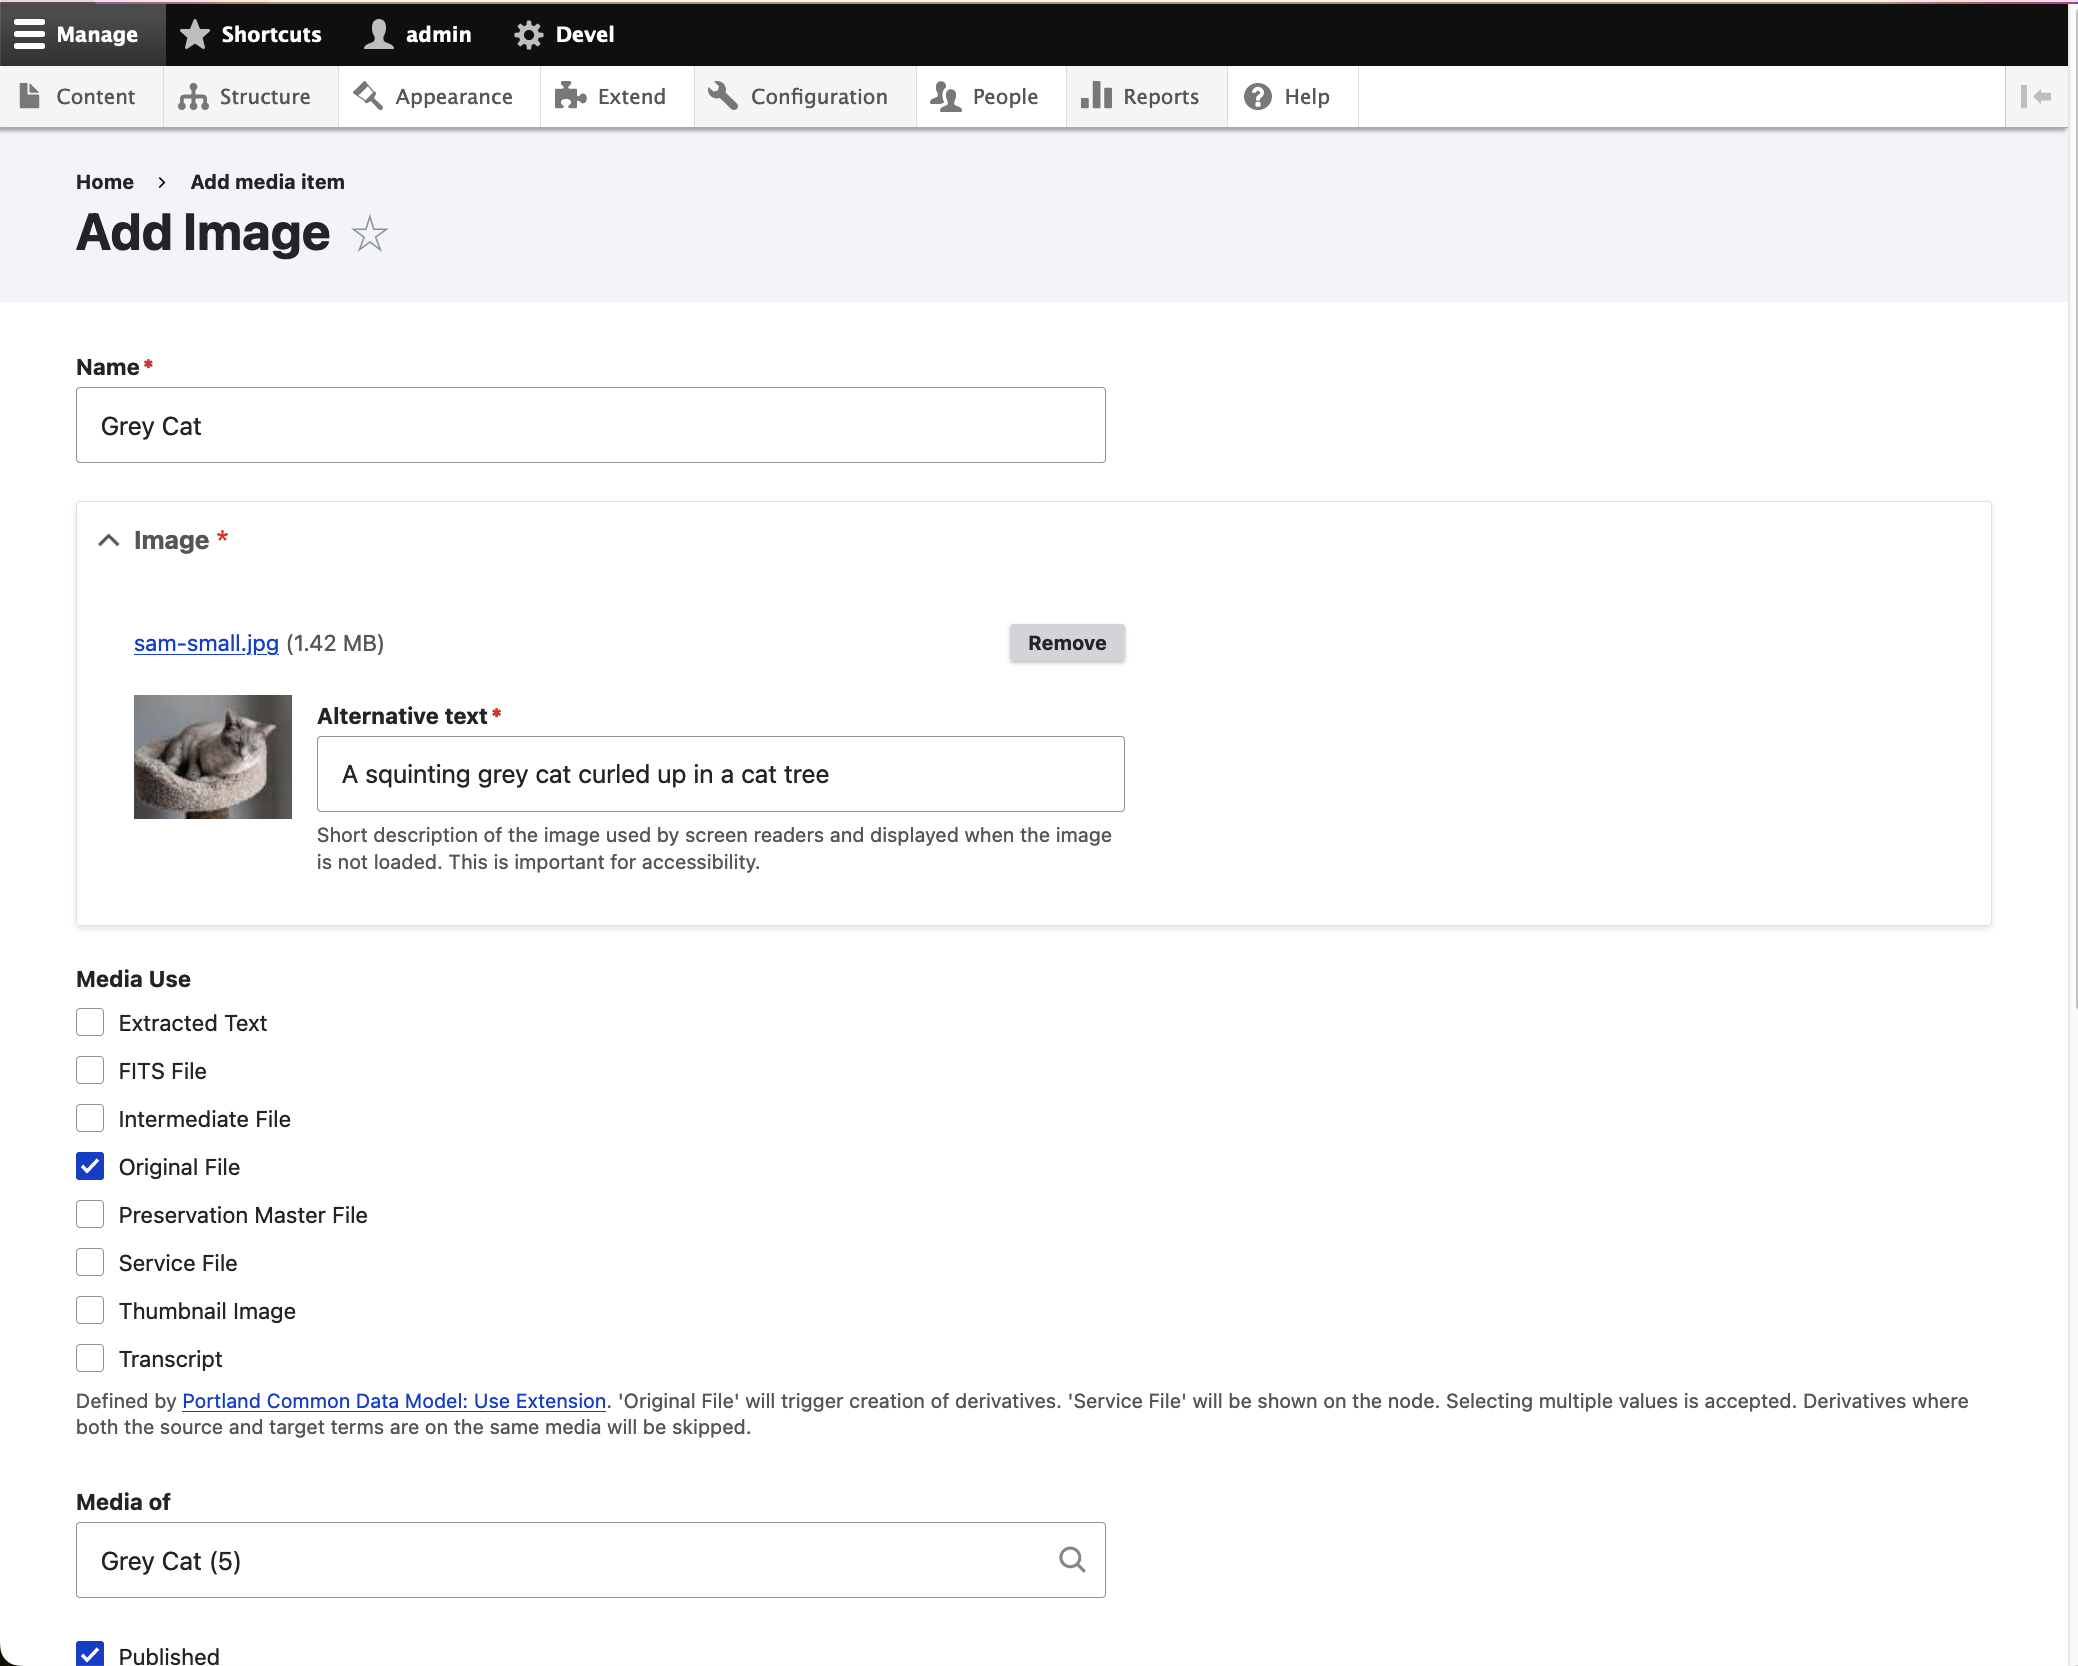
This form contains fields for metadata about the file, including "technical metadata". There are three important parts of the form:
- Name, which identifies this media.
- Image, the file to upload, and its alternative text.
- Media Use, describing what this file is in the context of its resource node. To trigger derivative generation, select the checkbox for Original File.
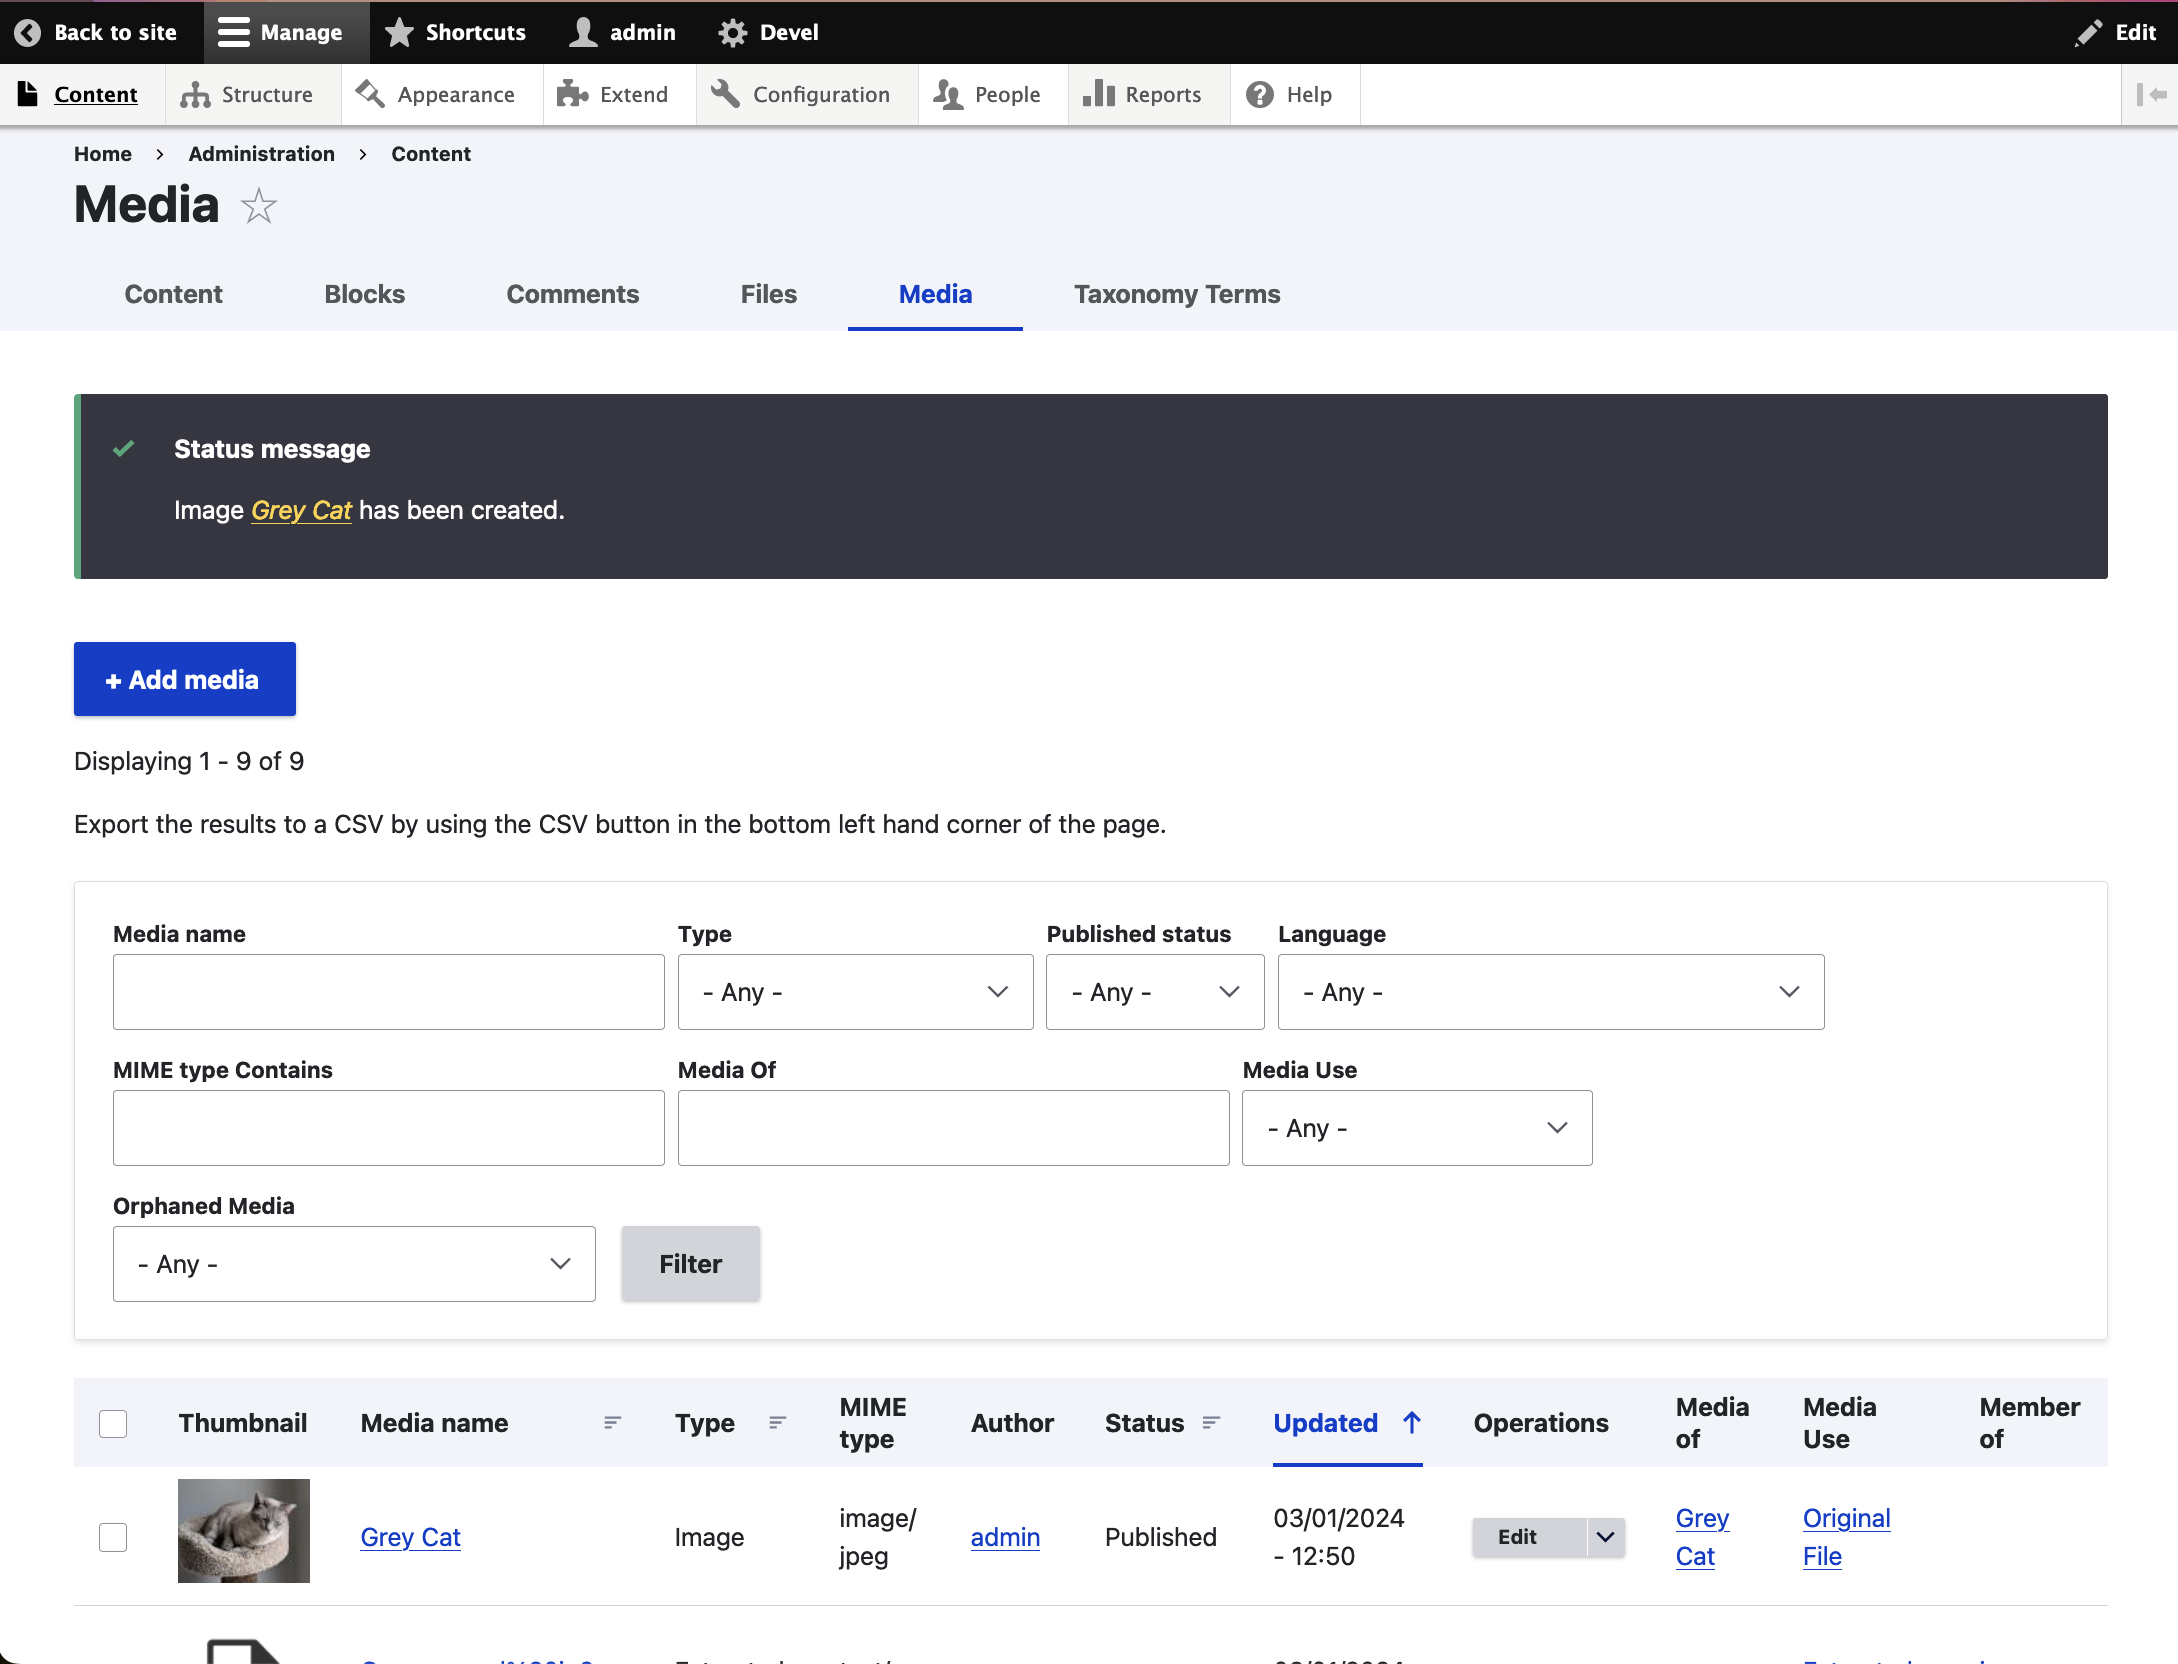
With the mandatory fields filled out (do not edit the "Media of" field), click Save, and a new Media will be created attached to your resource node. You will land on the administrator's list of Media (i.e. all media on your site, not just those attached to the resource node), and the new media object you created is at the top of the list.
Select the Media you just created, and you will see a page containing that Media's information and a rendering of the image that you uploaded.
Step 3: Verify derivatives were created
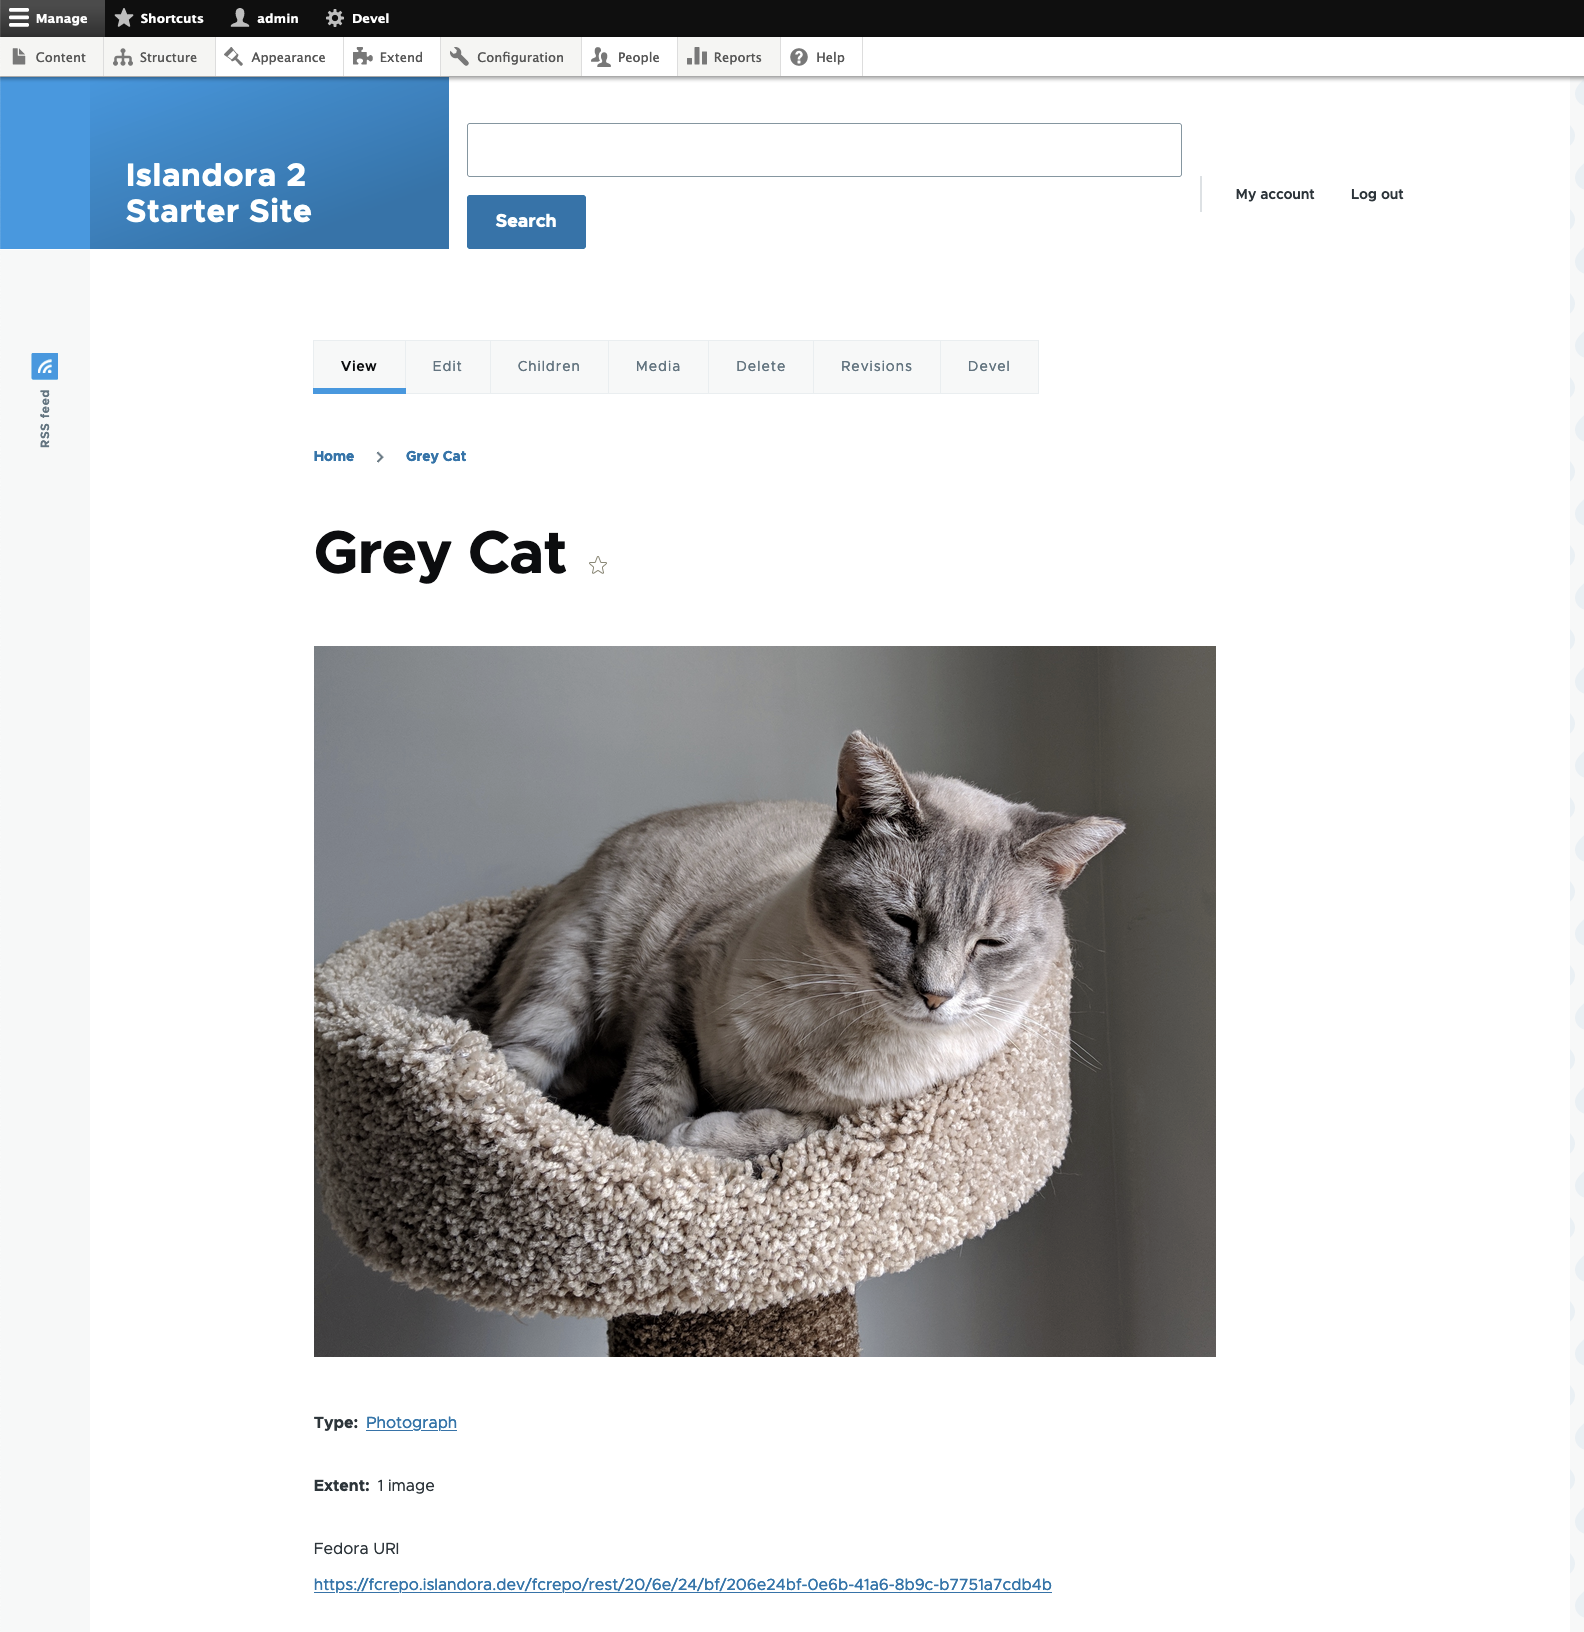
Now return to the node you created, and you will see the image along with its (minimal) descriptive metadata. The image you are viewing is not the one you uploaded, but a lower-resolution service file that was created and stored in the Drupal public filesystem.
If you open the node's Media tab, you should see new Media have been added - these are derivatives have been created automatically, including a service file, a thumbnail, and a FITS technical metadata file.
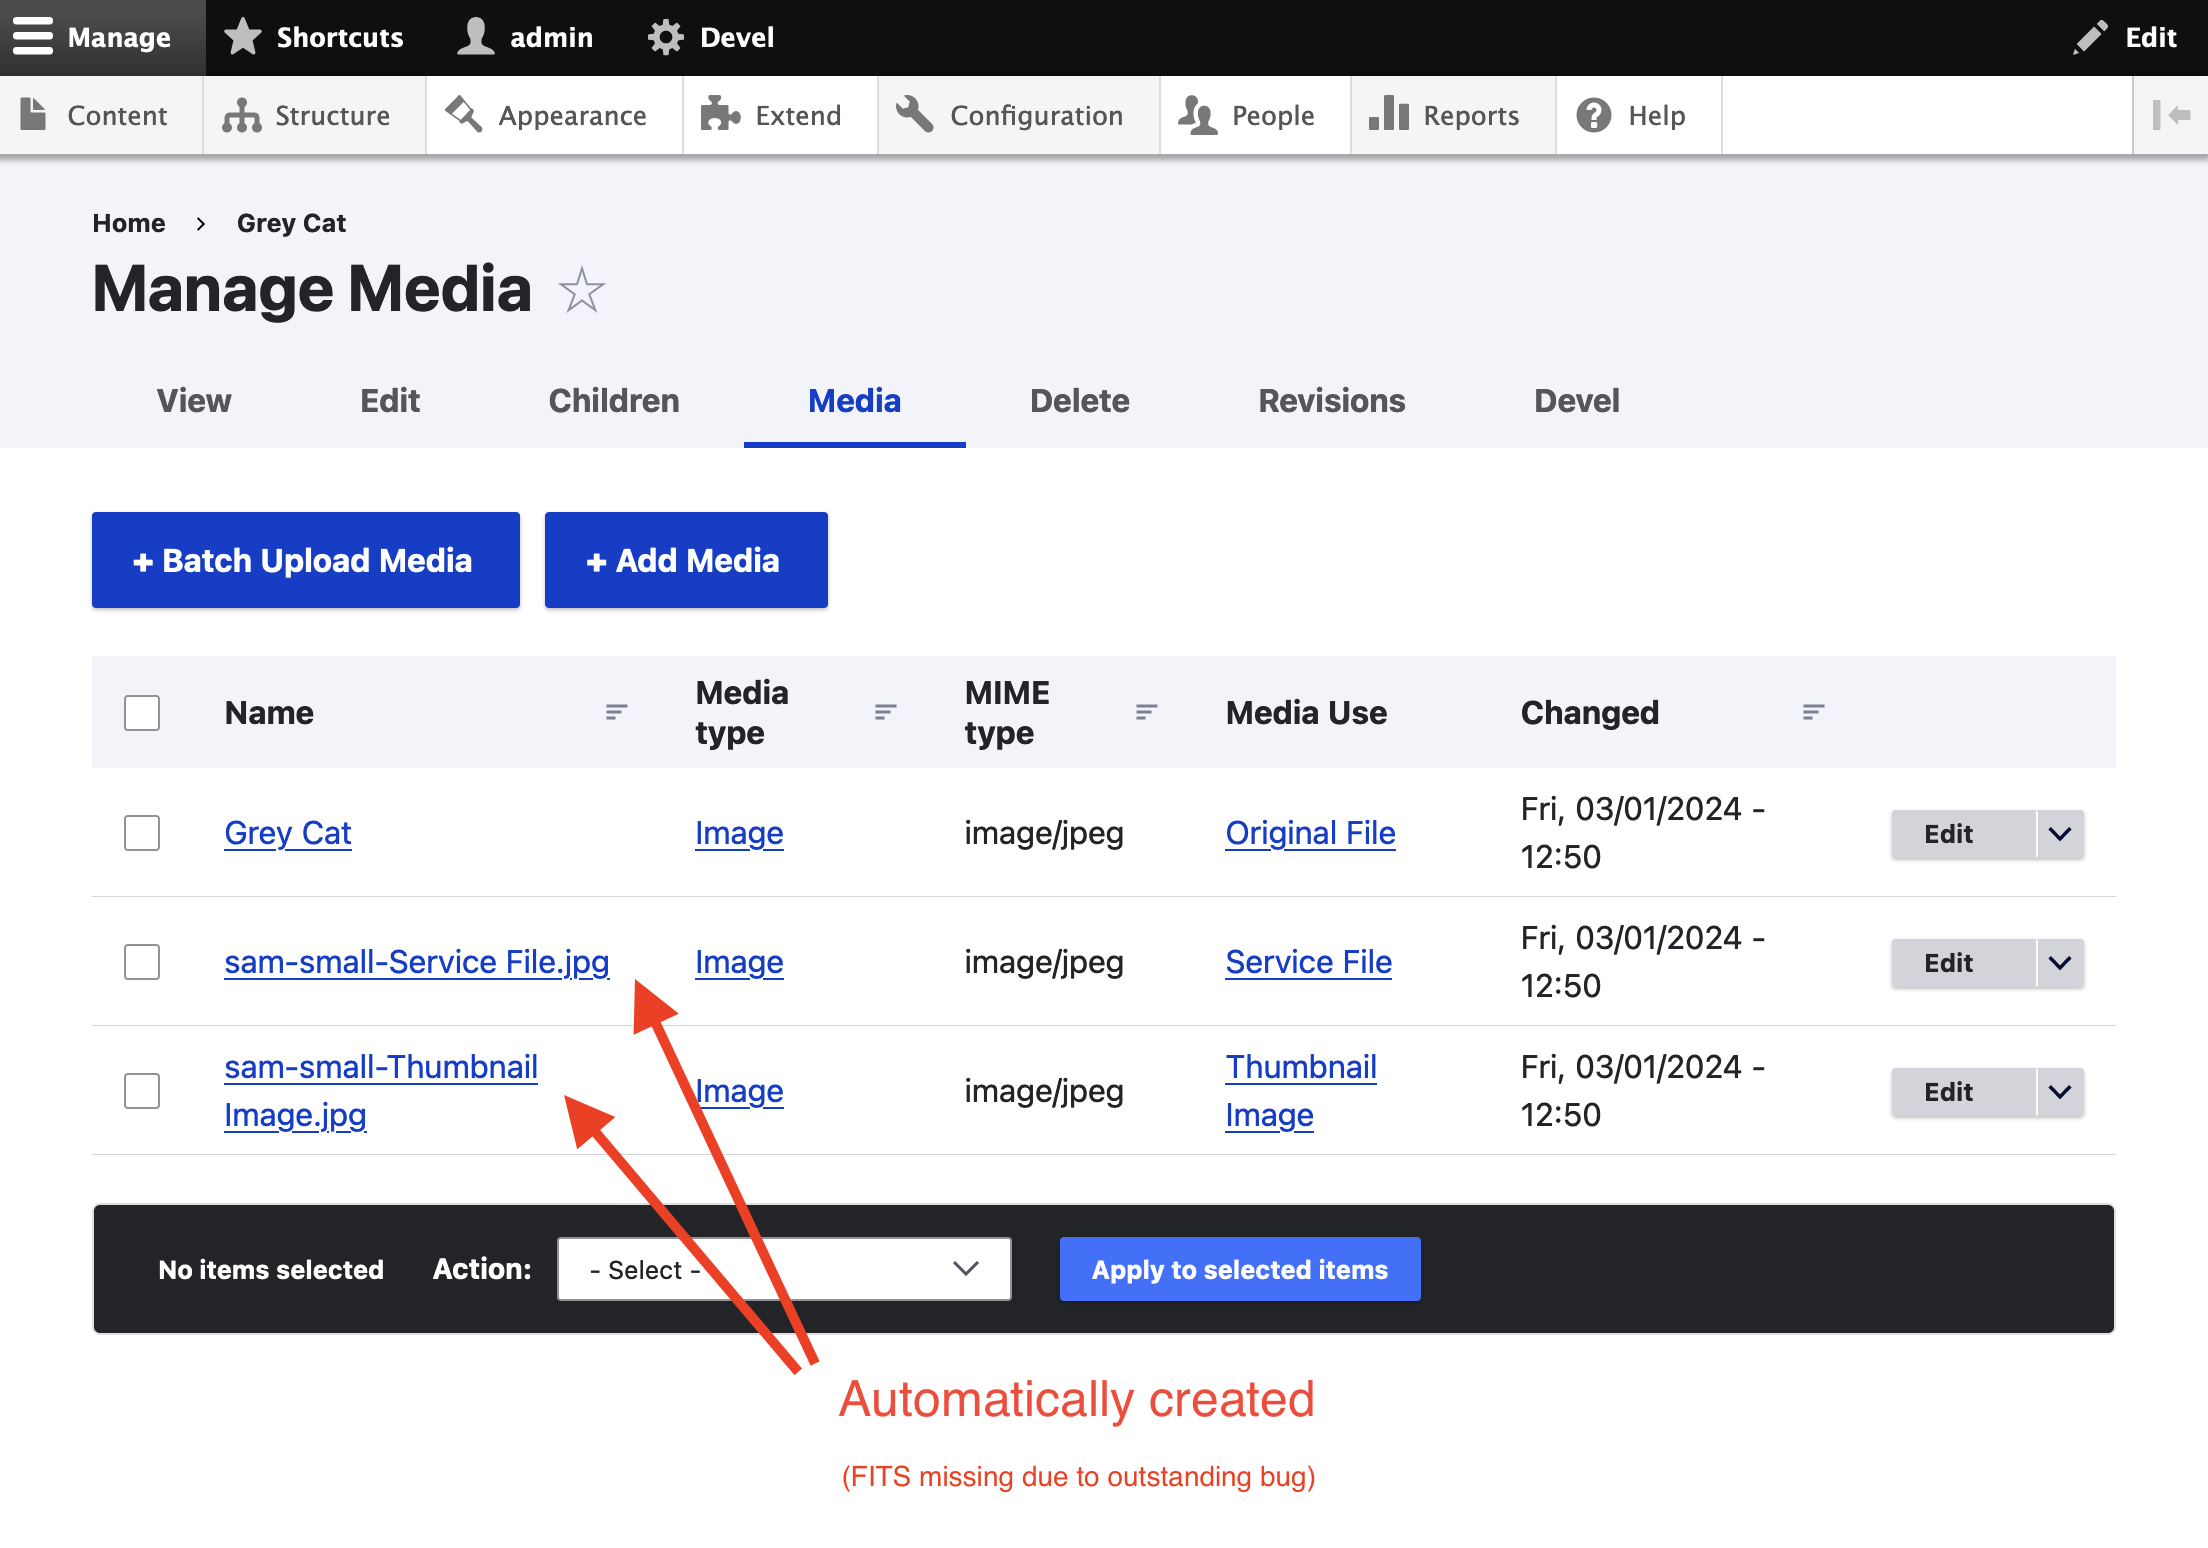
You now have an Islandora resource node, which is a special case of a Drupal node, and it has Media attached to it including an Original File, Thumbnail, Service File, and FITS Technical Metadata file.